
Removing Cosmoline and grease from your M1 Garand
When you receive a new M1 Garand that has been in storage you must perform a detailed strip of the weapon and remove all the cosmoline and grease that may be left on the metal parts. This is an important step that allows you to inspect the parts and verify their function and state of wear. If you haven’t performed a detailed strip of the weapon yet be sure to follow the link provided before continuing. [Detailed Strip Article]. This article deals with the process of cleaning the metal parts only. Stock and wood cleaning can be seen in another article here. [Cleaning Wood Article]
Ultrasonic Cleaning:
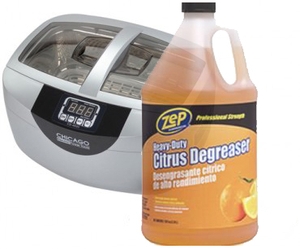
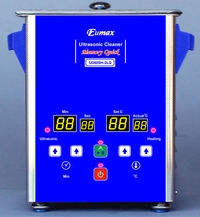
1 Ultrasonic Cleaning for many years was reserved for industrial use only due to their cost. In recent years many low-cost, medium power ultrasonic cleaning units have come on the market. They are a great time-saving device and do an excellent job at cleaning parts. When combined with a degreaser they are the fastest way to clean parts with the least amount of effort. Harbor freight sells a 2.5 Liter unit that works well for cleaning small to medium-sized parts. If you search EBAY you can often find deals on industrial-sized units. Avoid ultrasonic units designed specifically for jewelry. These units are underpowered and often have very small tanks and are not suitable for the type of cleaning we wish to do. A useful ultrasonic cleaner will have a tank size greater than 1.5 liters and a power output greater than 75 watts.
Never allow industrial cleaners and degreasers to get on your wood stock. These products will act like strippers and remove the finish from the wood.
2 Fill your ultrasonic cleaner with hot water and add an appropriate amount of degreaser. All of the small parts on an M1 rifle will fit inside the ultrasonic cleaner’s tank. Add all the parts, pins, and springs to the unit and run a five-minute clean cycle. After the first cycle is complete rearrange the parts in the tank and start a second five-minute cycle.
Before removing the cleaned parts from the ultrasonic tank you want to setup for the drying and water displacing step. Have your water displacing oil ready before going to step 3. A list of water displacing products is shown below. If the product doesn’t say “water displacing” then it likely isn’t.
- Du-Lite Kwikseal [LINK]
- WD-40 (Water Displacing)
- Brownell’s Water displacing Oil [LINK]
- Lauer’s Post-Treatment water displacing solution. [LINK]
3 Remove the parts from the tank when they are free of cosmoline. Rinse thoroughly under warm running water. Be sure to remove all traces of the degreaser when rinsing. Once rinsed, dry the part with a towel and immediately treat the part with your water displacing solution. Allow the part to air dry for several hours. Repeat this step until all of the parts are clean.
4 The receiver and barrel assembly most likely will not fit in your ultrasonic cleaner. To clean these parts follow the instructions below in the hand cleaning section dealing with the receiver/barrel assembly.
5 A final wipe down with a good gun oil finishes the cleaning process. Some water displacing oils leave a thin protective film behind to prevent rust. These parts don’t require a wipe down with oil but can be to improve the appearance of the parkerizing.
6 Always follow your local laws in disposing of cleaning solutions. This solution is an effective cleaner and can be reused several times before the solution loses its potency.
Manual (Hand) Cleaning:
Gather all the loose parts, pins, and springs you have after performing the detailed strip. You’ll want to find two small containers that can hold your parts and the degreaser. You’ll also need one container that can hold about a pint of boiling water. Boil about a gallon of water and have it ready. A tea pot with a pour spot is perfect for this step.
This is where I tell you not to pour boiling water on yourself.
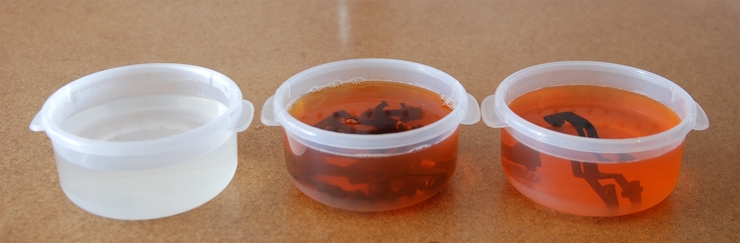
1 Start by preparing two containers of degreaser diluted according to the instructions with hot water (not boiling). Pour about a pint of very hot water into your third container and place several parts into the water. Cosmoline has a melting temperature of around 130F and will quickly melt off the parts and float up to the surface. Let the parts sit in the water for about 2 minutes. Pour the water off such that the floating cosmoline and oil don’t recontaminate the parts that are submerged.
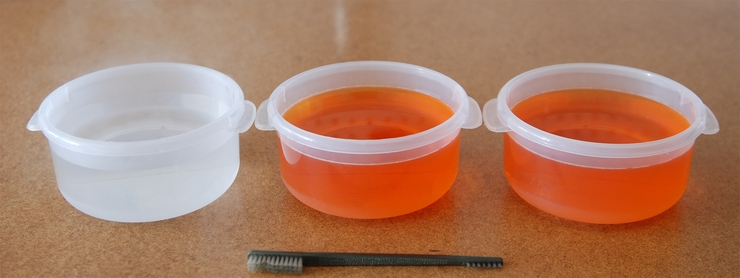
2 Move the parts into the first degreaser container and let them soak for five minutes. Parts will be hot!
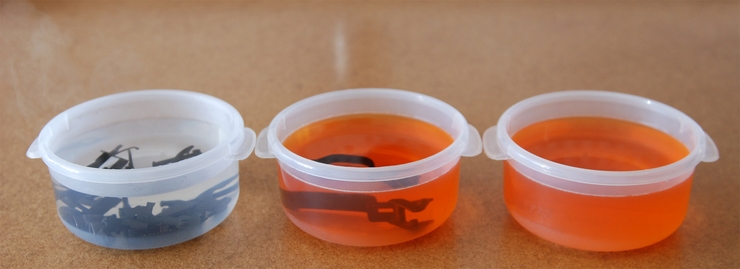
3Take one part from the first degreaser container. Scrub the part with a nylon brush to remove any surface contamination that exists. Rinse the part well and place it into the second container of degreaser.
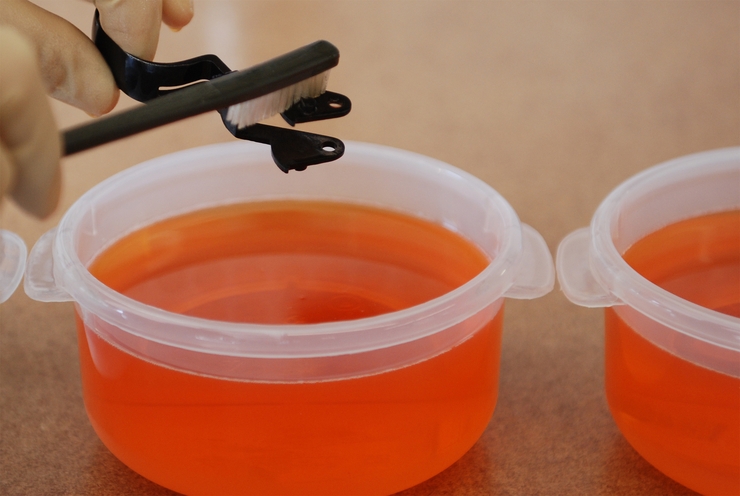
4 Let the part soak in the second degreaser container for another five minutes. Remove the part and use the nylon brush to scrub it a second time. Springs often take a little more effort to clean; the grease and cosmoline can get stuck in-between the coils. Take the time to clean these completely.
5 Rinse the part thoroughly with hot water and dry with a rag or paper towel. If the part is still dirty place it back into the second container and repeat step #4. If the part is clean treat the part with a water-displacing oil immediately and allow it to air dry for several hours. Wipe off any remaining water displacing oil and treat the parts with your favorite corrosion prevention product.
6 Take the next set of parts and repeat steps 1 through 5. If the first container of degreaser becomes too dirty you can dump the contents and pour the solution from container #2 into container #1. Refill the second container with a clean degreasing solution. The parts being cleaned should always move into a cleaner degreasing solution.
7 The Receiver, Barrel, and Op-Rod are too large to fit into a container and will need to be cleaned by hand. Hold the barrel facing up and pour boiling water over the receiver causing the cosmoline to run off. Be sure to rinse both the internal and external surfaces of the receiver. When the receiver is cool enough to handle pour boiling water over the outside of the barrel and down the barrel to remove any cosmoline that remains. Wait for the parts to cool enough to handle before continuing.
8Use the clean degreaser solution from container number #2 and scrub all the exposed surfaces on the receiver and barrel. Rinse the receiver and barrel with hot water when done. Rinse well.
9Immediately dry the parts with a towel or rag and treat them with a water-displacing oil. Special attention to the barrel receiver interface should be made when applying the water displacing oil. The inside of the barrel should be cleaned after the water displacing step has occurred using normal barrel cleaning techniques.
It’s not uncommon to spend several hours cleaning the barrel of a mil-surplus rifle that has been in storage for decades. Don’t stop cleaning until the patches come out clean. See our article on barrel cleaning techniques and solvents. [Link to Article]
Manual (Solvent) Cleaning:
Gather all the loose parts, pins, and springs you have after performing the detailed strip. You’ll want to have a good pair of solvent safe gloves ready and proper eye protection on before continuing. Always use solvents in a properly ventilated environment. You’ll want to purchase several cans of brake cleaner and you’ll need a good nylon cleaning brush.
Latex gloves are NOT compatible with most solvents. A good chart of glove material compatibility can be found here. [LINK]
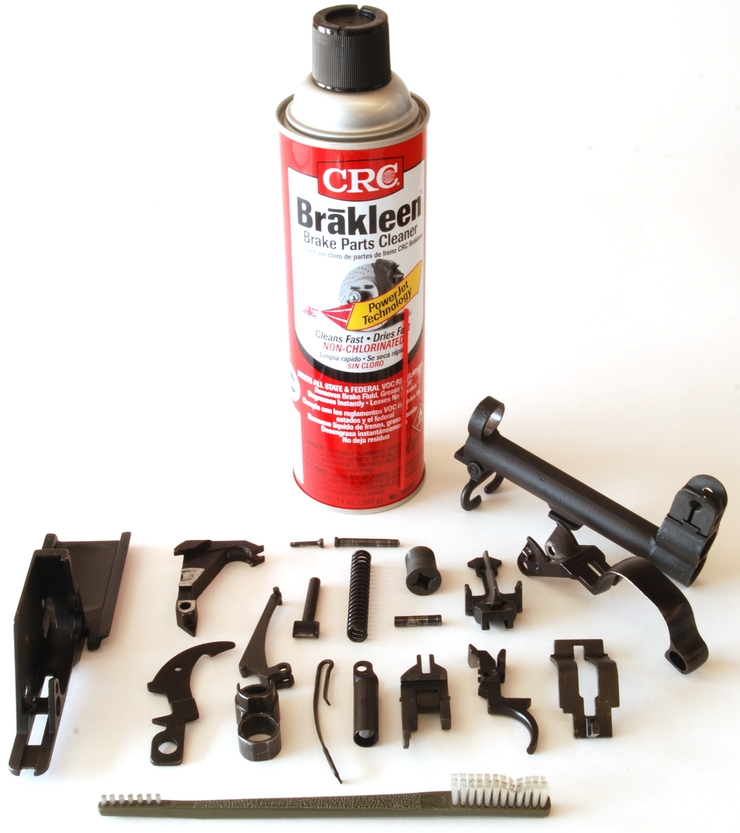
1 Place a part in a solvent-compatible container and spray down with brake cleaner. Using your nylon brush scrub off any grease or cosmoline that is on the part. Spray part again and set aside to air dry.
2 When all the parts have been cleaned they must be treated with oil to prevent corrosion. Use one of the above-listed water displacing oils or your favorite corrosion inhibitor.