
Cleaning your M1 Garand Barrel and Gas System
Your M1 Garand should be cleaned periodically to prevent corrosion and to ensure the proper operation of your M1. When fouling becomes excessive the accuracy potential of the rifle will begin to degrade. We recommend cleaning every 300 rounds fired or when the rifle is not going to be in service for more than two days.
If you are shooting corrosive ammunition the rifle must be cleaned immediately after shooting has been completed. For cleaning corrosive ammunition see the section at the end of the article.
Before beginning, verify that your M1 is unloaded by pulling the op-rod handle fully back and inspecting the chamber!
Getting Started:
There is almost an unlimited number of tools to choose from when cleaning your rifle. Hundreds of cleaning kits and solvents are available at your local gun stores and websites. We’ll be presenting one cleaning method that we feel is the easiest to use. This method is easy to use and protects the accuracy potential of your rifle.
Avoid breaking down the rifle and field stripping it unless you absolutely must do so. The process of disassembling the action on the rifle degrades its accuracy. For this reason, we only field-strip our M1 Garands at most once a season. During this time all the internal areas are cleaned of grease and oil and fresh lubricants are applied.
The Tools:
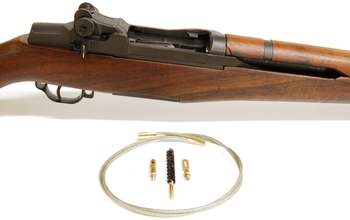
Our cleaning kit of choice is made by OTIS. Their .30 caliber cleaning kit is the perfect compact tool for cleaning your M1 Rifle. Because of the design of the rifle, a cable-based cleaning system is ideal for use in the M1 rifle.
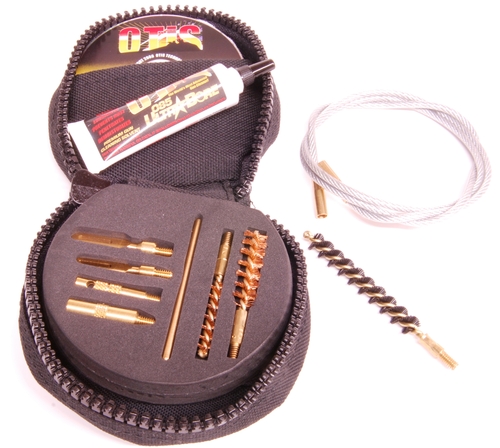
A pull through cable system moves fouling from the breech to the muzzle improving cleaning efficiency. A cable based system is also much faster and convenient to use. Unlike a bolt gun the the M1 has the follower and bolt in the way which makes using a cleaning rod difficult.
The solvent that comes with the OTIS kit isn’t the best in our opinion. Its ability to remove powder fouling is average and it has no copper removing capability. It’s good to keep the tube with the kit when needed in the field. However, a quality solvent should be purchased for regular cleaning duty.
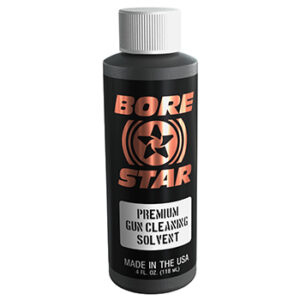
We’ve recently created a new gun cleaning solvent after years of formulation and testing. Bore Star, our new product easily outperforms all other brands in both copper removal rates and power fouling removal. Bore Star is odor-free and works will all firearm types. When coupled with the OTIS cleaning system this pair of products makes cleaning your M1 rifle a simple task. Be sure to pick up a bottle of gun oil as well. A little bottle of oil should last you several years or more.
Always wear protective gloves on your hands when working with solvents.
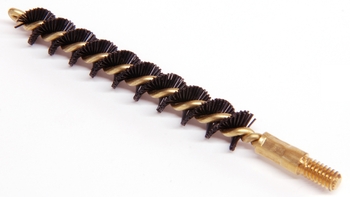
The last item you’ll want to acquire is a good set of nylon bore brushes. Because our solvent is designed to dissolve copper we cannot use bronze or brass cleaning brushes. These brushes will quickly break down and leave a false-color behind. This false-color will transfer to the cleaning patch and make it look like your barrel has copper fouling when it may not.
Our brush of choice is made by Montana x-Treme. Their Heavy Duty Rifle bore brush should last you several years and is quite affordable.
The Process:
1If you have a gun vice or cradle, place the M1 upright with the bolt locked back. If you don’t have a cradle, lay the M1 on its side on a table or bench with the operating rod handle facing up. Get your OTIS kit out with a few patches. Install the slotted tip on one end of the cable and screw in the obstruction remover on the other end.
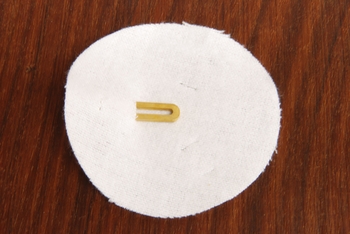
2The OTIS system uses a circular patch that has several slots cut in the patch. This system allows you to use a patch several times before being discarded. Start by sliding the slotted tip through a patch as shown below.
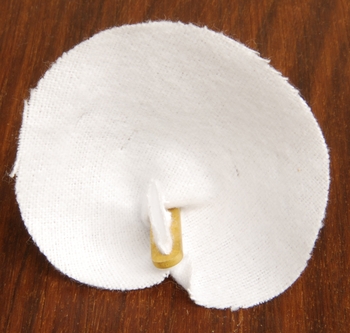
3Pinch the patch as shown below and push the folded section in the pinch through the slot on the end of the slotted tip.
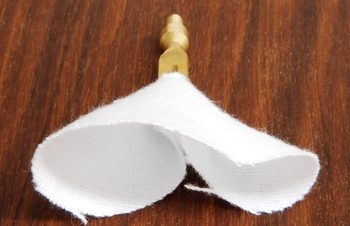
4Now grab the patch and pull it toward the end of the slotted tip locking it in place. When done correctly your patch should look like the image below.
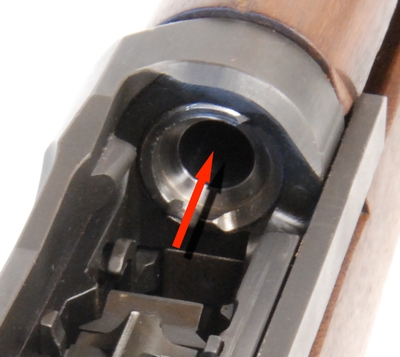
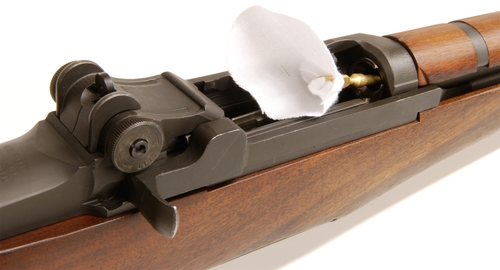
5If the slotted tip isn’t yet attached to the cleaning cable, do so now. Apply cleaning solvent to the small end of the patch until it’s saturated about an inch up the patch. Slowly Slide the opposite end of the cable into the bore and feed it through the barrel until it exits at the muzzle. It should look as shown below as the patch enters the chamber.
6When the patch enters the chamber, stop pulling on the cable and rotate it several times clockwise. This will spin the patch in the chamber, cleaning it.
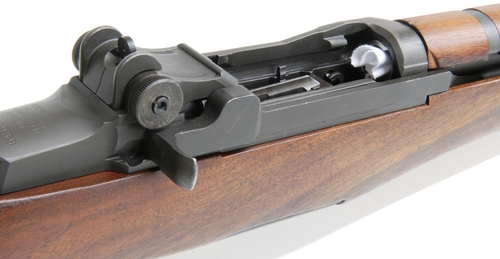
7Slowly pull the patch through the chamber until it exits the muzzle. Pull the patch off the slotted tip. Flip the patch over and insert the slotted tip into a new slot on the patch. Add additional solvent to the patch and pull it through the barrel again.
We find that the OTIS patch is normally good for three uses before being discarded. Each time the patch is used, flip it and insert the slotted tip into a new slot in the patch and add solvent. OTIS states that the patch is good for six uses but we find that three is all you will get before the patch becomes too dirty for further use.
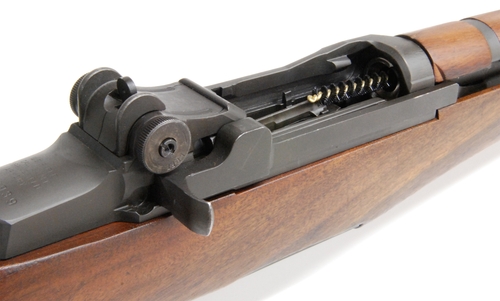
8After you have pulled two patches (3 times per patch) through the rifle, replace the slotted tip with the nylon bore brush. Apply some solvent to the brush and pull it through the barrel three times. The brush is not needed after this step. Clean the brush to remove any fouling or contamination that may be left on it before putting it away.
Wrapping a small 1″x1″ patch with solvent around the brush can be effective at removing stubborn carbon deposits.
9Install the slotted tip back on the cable and install a new patch. At this point, you may notice that the powder fouling has decreased or stopped completely and the patches are beginning to show some color. The blue on the patch is from the copper in the barrel. When the patches begin to show more copper color (blue) and less powder fouling, extend the time between patches. This allows the solvent time to dissolve the copper in the barrel.
when only copper fouling remains, wait for a few minutes before pulling a fresh wet patch through the barrel. Let the solvent do the work here. You do not need to scrub out the fouling. The chemical process is doing the hard work for you.
10When a fresh wet patch is pulled through the barrel and no more color is present, you’re done cleaning. Remember that bronze tips and brushes can add some false color to the patch so don’t confuse this with copper deposits from the barrel. Now pull a dry patch through the barrel to remove any solvent left behind.
11Finish cleaning the barrel by taking a clean patch and applying some Gun Oil to the patch. Apply approximately six to eight drops to the patch and pull it through the barrel several times. The Gun oil will protect the metal surface of the barrel from corrosion.
The Gas Cylinder:
The gas cylinder on the M1 Garand does not need to be cleaned after every outing. The gas cylinder is stainless steel and won’t rust. We recommend cleaning every 500 rounds fired or when the rifle is not going to be in service for more than a week. Do not remove the gas cylinder from the barrel if possible. Doing so will hurt the accuracy potential of the rifle. The gas cylinder can be cleaned with the rifle assembled. You do not need to field strip the rifle to clean the gas cylinder.
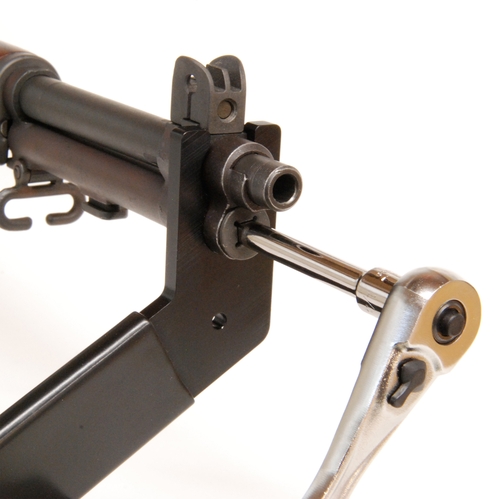
1Using a Gas cylinder wrench or a padded vice, support the gas cylinder, and using an appropriate tool for the type of gas screw you have, unscrew the gas screw from the gas cylinder. The gas screw can be very tight.
A 1/4″ socket extension fits nicely in the gas screw. This allows you to use a socket driver to loosen and tighten the gas screw. The older single slot type of gas screw will require a large standard screwdriver or the use of the combination tool.
2 With the gas screw removed, pull back the operating rod and lock the bolt open. This retracts the operating rod piston and allows us access to the inside of the gas cylinder. Take a .45 Caliber bore brush and wrap a patch around it. Apply solvent to the patch until saturated. Scrub the inside of the gas cylinder with the brush/patch several times. Flip the patch and repeat. Continue until all the powder fouling has been removed.
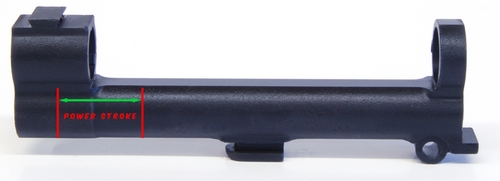
The gas piston and the last 1″ of the gas cylinder that is not accessible do not require frequent cleaning. These areas can be cleaned during the yearly maintenance cycle. The power stroke occurs in the first half-inch to an inch of the gas cylinder closest to the gas screw. During the power stroke, Gas blows past the piston and exits out the rear of the gas cylinder.
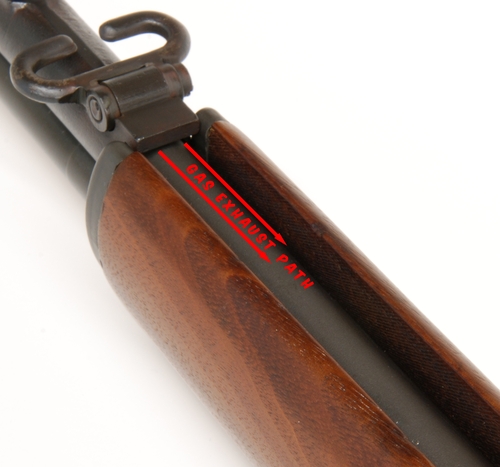
3Clean the gas screw and the op-rod where it tracks under the front hand-guard. The gas escaping from the gas cylinder will leave fouling on the op-rod here and often on the sling. This is normal.
4 The gas cylinder can be left dry or a few drops of oil can be applied to the inside surface. Any excess oil or grease in the gas cylinder will be blown out after the first shot. Add a few drops of gun oil to a patch and oil the inside of the gas cylinder. We find that this makes future cleaning easier.
5 With the gas cylinder supported, torque the gas screw on to 10 Ft-Lbs. A drop of oil can be applied to the threads of the gas screw. Friction between the threads is not what makes a bolt or gas screw tight. Bolt stretch is what applies the clamping force. In the case of the gas screw, the flange that makes contact with the gas cylinder applies the holding force. Keep the flange and the mating surface on the gas cylinder dry.
6Finish up by cleaning the bolt face, follower, and any fouling present in the receiver. When finished, re-apply grease to any of the required surfaces that need it. You can see the grease locations by following this link. [Greasing your M1 Garand Link]
Corrosive Ammunition:
What exactly is corrosive ammunition? Many shooters today have heard of corrosive ammunition but probably have never seen or shot any. The word corrosive conjures a mental image of acids or other evil substances that want to dissolve your rifle. Thankfully, in this case, the offending corrosive agent is only salt; Potassium Chloride.
This salt doesn’t come from the gunpowder in the ammunition. Rather, it comes from the primer. The salt is the result of potassium chlorate (The priming agent) decomposing into KCL (Potassium chloride) a salt. As a general rule ammunition made after 1954 will not be corrosive. There are exceptions, of course.
So how does this salt cause rust in my rifle? KCL by itself does not cause rust. It’s hygroscopic; meaning it takes up water and holds it. That water reacts with the steel(iron) producing a very small electrical current that breaks the water into hydrogen and oxygen. The free oxygen goes after the iron-producing rust. The KCL adds more ions to the solution which increases the current flow and the rusting process.
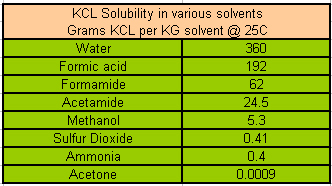
Because the process generates oxygen, putting a coating of oil over the problem does not stop the rusting process. It may slow it slightly, but it doesn’t eliminate it. The only way to prevent rust is to remove the KCL. To do that we want to dissolve the salt in a solution and wash it out of the rifle. The chart below shows which solvents are the most effective at dissolving KCL. The obvious winner is plain water. The hotter the better.
Windex is often mentioned as a good cleaning agent after shooting corrosive ammunition. If we look at the ingredients in Windex we find the following: Isopropanol,2-Butoxy ethanol,Ethylene glycol n-hexyl ether,Water, Ammonia and other surfactants. The only ingredient with any ability to remove KCL is the water component which is the fourth ingredient in the list. The water component can remove KCL, but the solution as a whole is not as good as water by itself.
Cleaning after using Corrosive Ammunition:
1Start the cleaning process the same as shown above. Clean the rifle until all the powder and copper fouling have been removed. Clean the gas cylinder as described above and place a paper towel or clean patch inside the gas cylinder past the gas port. This is to keep water from running down the gas cylinder. Do not oil the barrel or gas cylinder yet.
2Fill a small water bottle with hot water. With the barrel pointing down toward the ground with a slight angle begin to slowly pour the hot water into the breach and let it flow out of the barrel. Pour at a rate such that the water contacts all surfaces inside the barrel as it runs down its length.
3Repeat the water flush one additional time with hot water. When finished be sure to completely dry any spilled water in the receiver and run several dry patches through the barrel and gas cylinder until all the water has been removed. The use of a water-displacing oil can be helpful at removing any water that’s in between the gas cylinder and the barrel.
4Be sure to oil all the surfaces that came in contact with the water. Inspect the rifle after 24 hours for any signs of rust. If present repeat the flushing process and oil the parts again. Clean the bolt face well and watch for signs of rust over the next week.
5Wash all your cleaning brushes, slotted tips, and cables in hot water when finished to eliminate any Potassium Chloride that might be on them.