
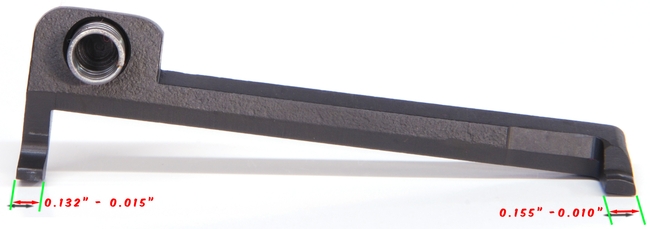
M1 Garand Enbloc Clip Troubleshooting
The M1 Garand uses an enbloc Clip to load cartridges into the rifle. If the shooter is having difficulty loading a clip or other clip-related malfunctions are occurring, this article should provide an insight on the cause. This article will cover how to properly insert the enbloc clip and how to diagnose some of the more common problems the new shooter can experience. Most of the corrective actions we’ll be discussing come from the Army’s TM9-1275 manual.
Before beginning, verify that your M1 is unloaded by pulling the op-rod handle fully back and inspecting the chamber!
Getting Started:
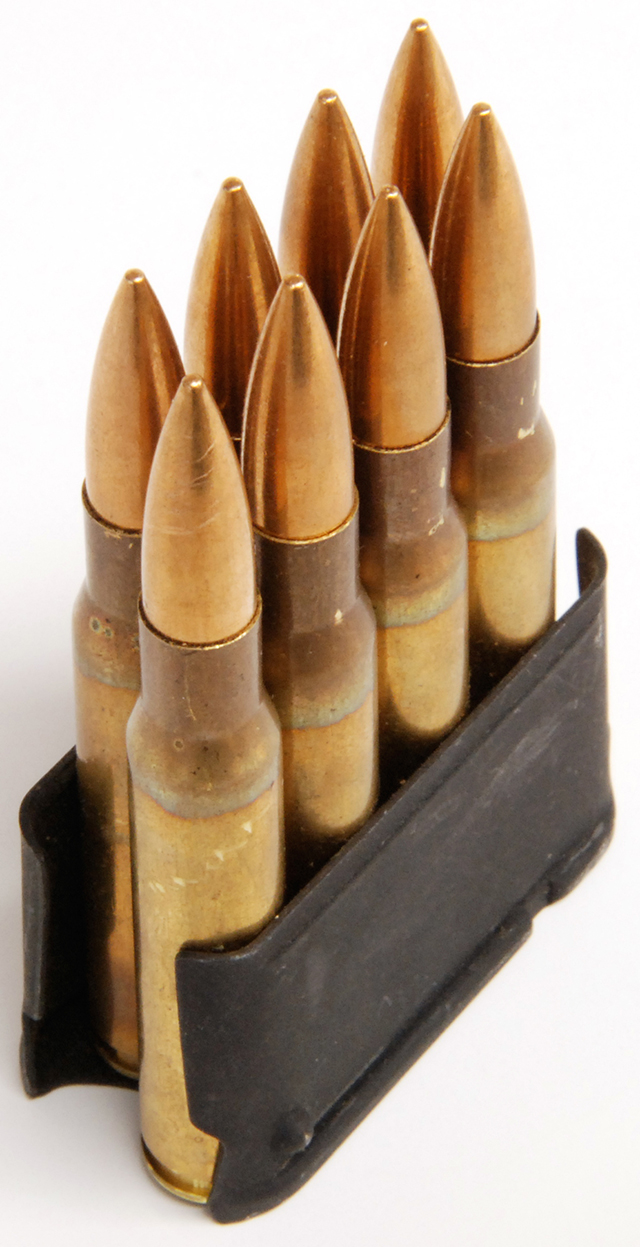
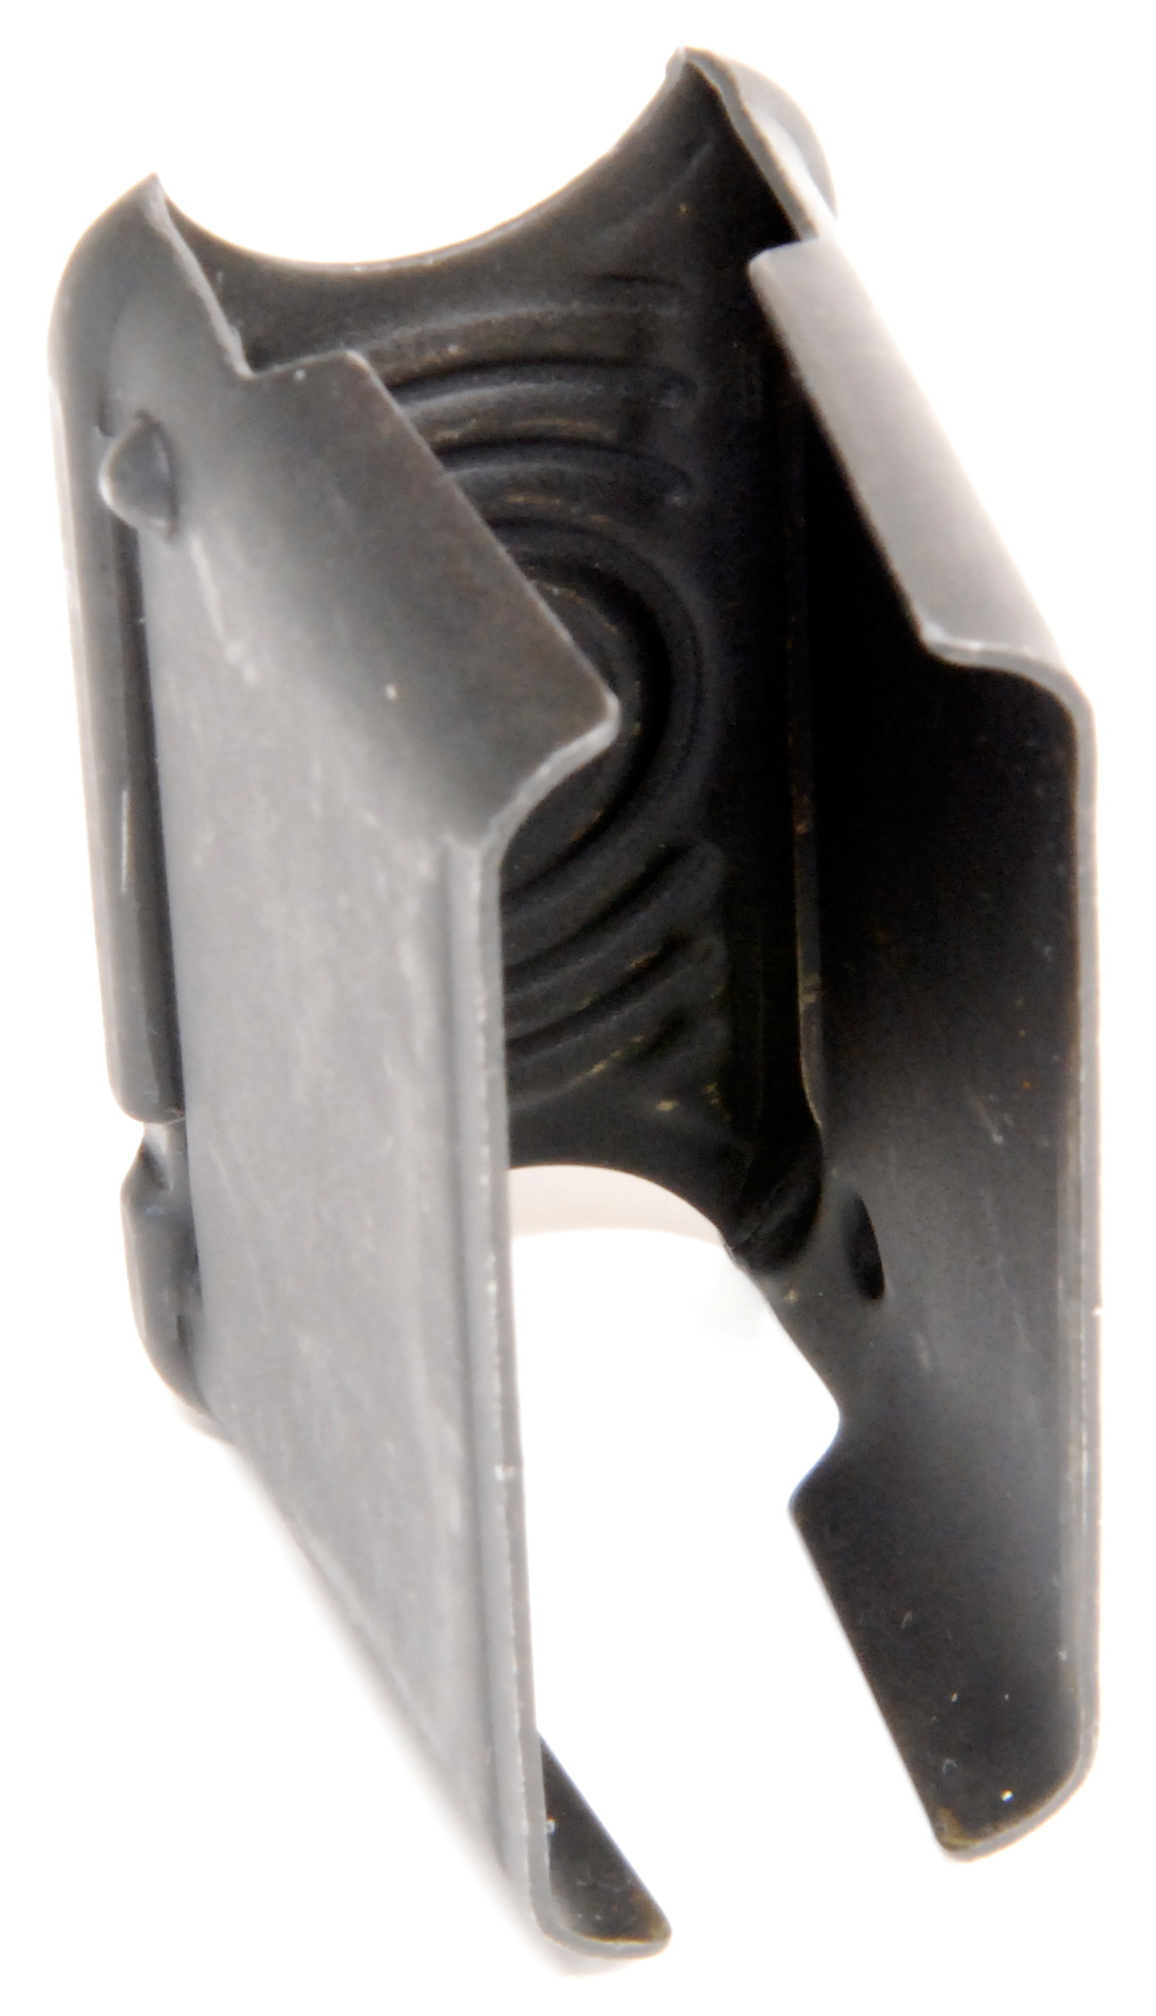
The standard enbloc clip holds 8 rounds. When loaded it looks like the image below. The standard round that the M1 Garand shoots is known as M2 Ball. The image below shows this type of ammunition loaded in the clip.
1 Clip inserts with difficulty:
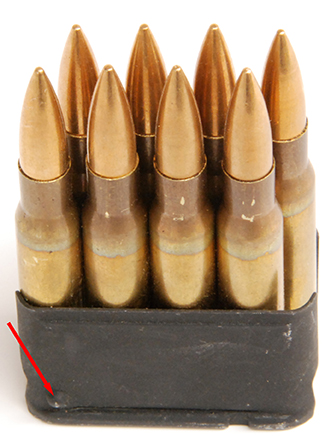
The first step is to verify that the clip is loaded properly. All the cartridges loaded should be the same height with the base of the cartridge fully seated in the clip. As a general rule, you want the top round to be on the side of the clip with the indexed bump (Shown below). This positions the top round such that when right-handed shooters press the clip in the round is closer to the right hand. The clip can be loaded either way without issue.
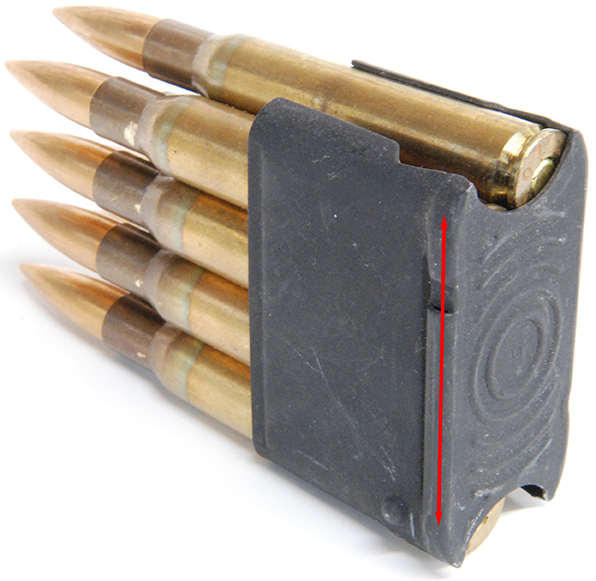
New clips that haven’t been used before sometimes can be difficult to insert, especially if the parkerizing is coarse on the guide rails. In the image below the rail on the clip is highlighted. If you’re having difficulty with a clip try using a very fine stone or abrasive cloth and remove the parkerizing on both of the rails. Be sure to apply some grease to the guides in the receiver that accept the clip. If you’re still having problems inserting the clip be sure to follow the steps listed below.
2 Clip can only be partially inserted:
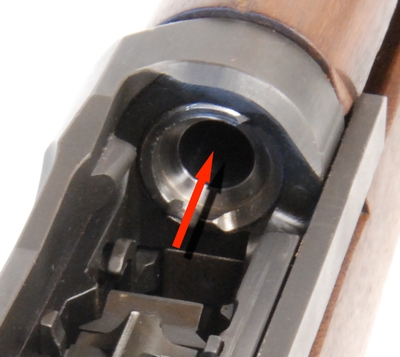
Visually inspect the receiver well and verify that no object is obstructing the follower from being depressed. Make sure the op-rod is fully locked back and do not touch it while working around the follower.
If you pull back on the op-rod even the smallest amount with the follower depressed the bolt will snap shut on your hand.
If no obstructions are found. Field strip the rifle and verify that follower rod is correctly assembled as shown below. See the image below for the correct orientation of the follower rod. If the rod is correctly assembled examine the magazine for burs.
Burrs In The Magazine:
Burs in the follower and slideways will prevent the follower and slide from functioning, thereby making it difficult to insert a loaded clip. Inspect the follower, slideway for any signs of burrs. If found the burrs can be removed using a very fine stone. Check the rails on both sides of the receiver.
- Interference Between the Bullet Guide and Follower Arm:
With the right hand holding against the operating handle so that the bolt does not release. depress and release the follower and slide several times with the left hand and observe if interference is encountered between the bullet guide and follower arm.
This interference is often caused by the opening in the bullet guide being “squeezed in” thereby causing the follower arm or follower rod to drag on the bullet guide. Remove the bullet guide from the receiver and with a suitable wedge spread the opening until the suitable clearance is obtained between the bullet guide and follower arm. If you have a spare bullet guide try swapping out the existing one first.
3 Failure to Eject the Clip:
The empty enbloc clip should be ejected from the rifle and the bolt locked back when the last cartridge is fired. If the clip fails to eject then the problem is normally found in one of the three causes listed below.
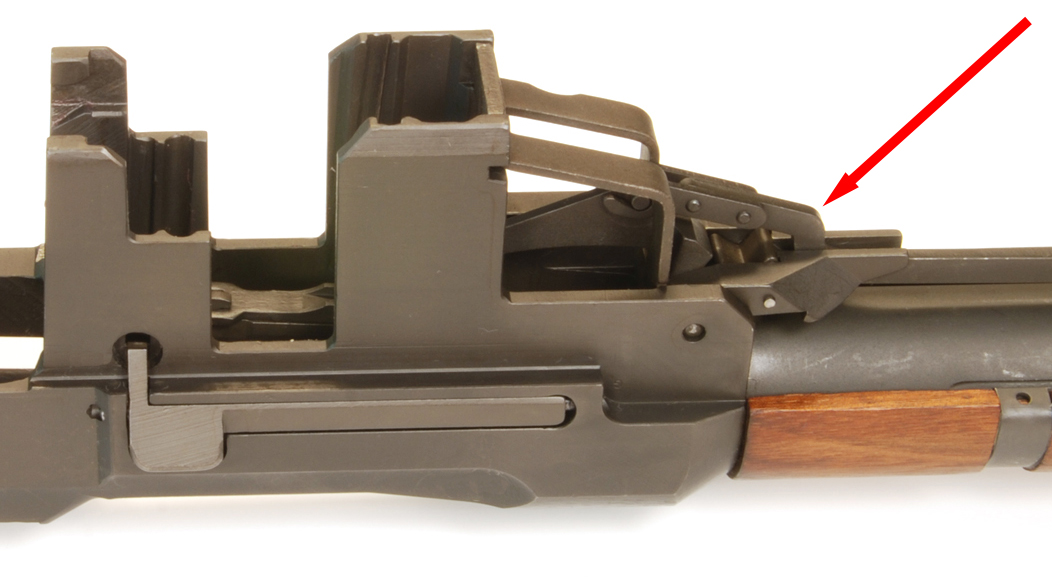
- Clip Ejector Weak or broken.
[Good Clip Ejector Shown]
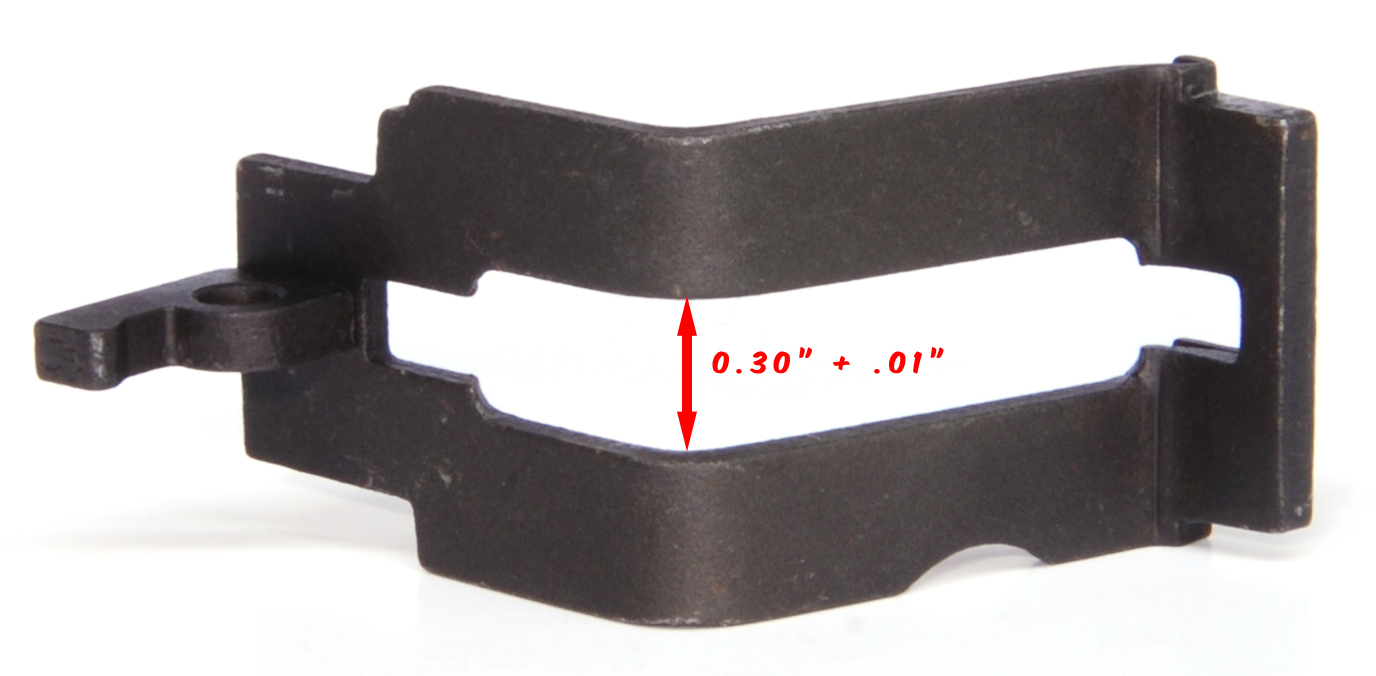
- Distorted Clip
[Good Clip Shown]
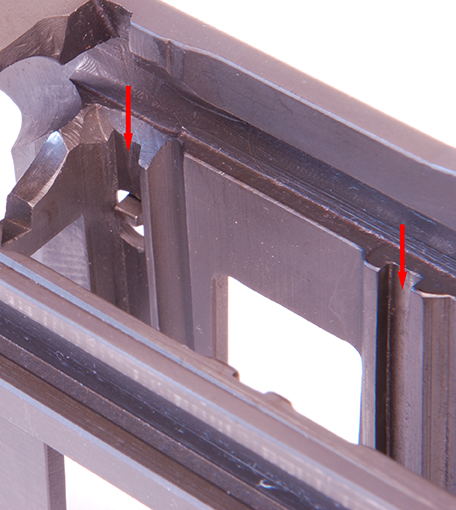
- Deformed or Broken Operating Rod Catch
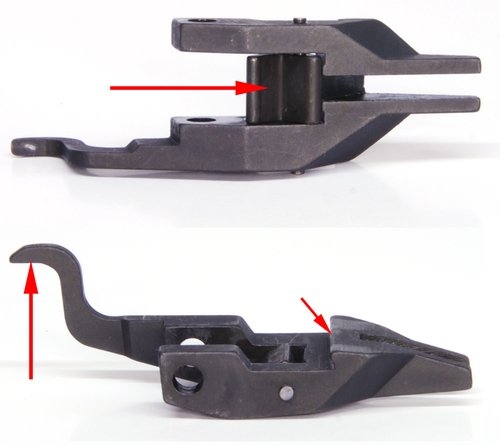
[Good Operating Rod Catch Shown]
4 Bolt Fails to Release when Clip is Latched:
This condition can normally be traced to two possible failure modes.
Insufficient Radii or Burs on Catch and Operating Rod Hooks.
Insufficient radii or burs on the hooks of the operating rod and operating rod catch may prevent them from “riding over” each other, thus preventing the bolt from releasing when the clip is inserted and latched. This condition may be remedied by lightly stoning the edges of the hooks with a fine-grained sharpening stone.
Extreme care must be exercised when stoning so that the radii are not enlarged excessively as this will cause the bolt to release before the clip is latched.
If you lack the experience or tools to properly remove any burr’s we recommend purchasing a replacement part.
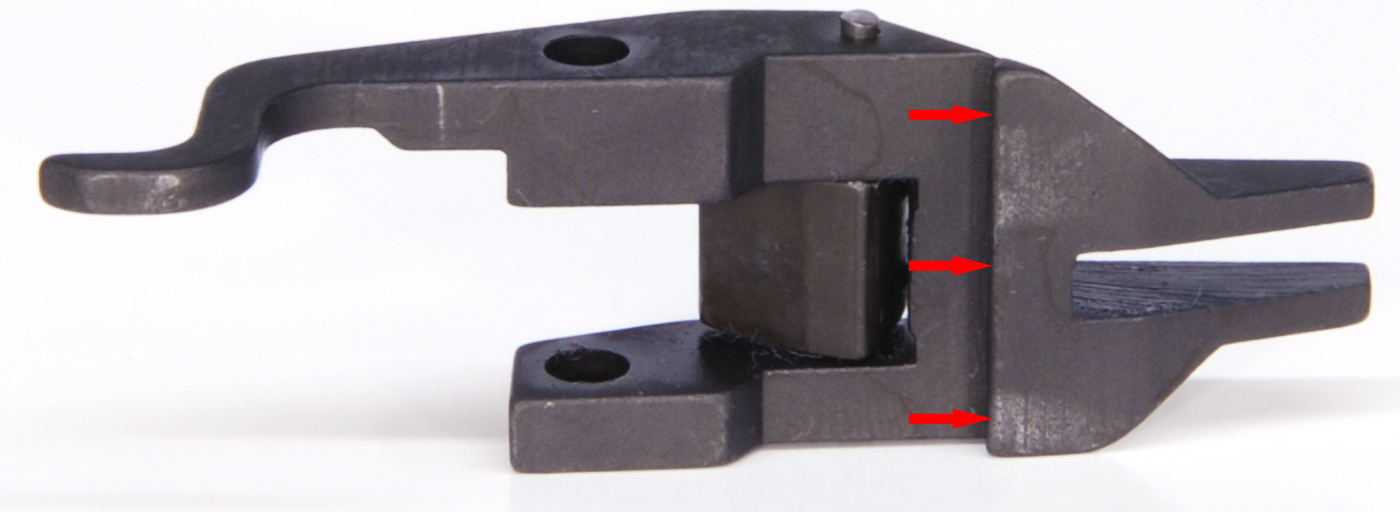

- Bullet Guide Low at Accelerator Bearing Point
If the bullet guide is worn sufficiently at the accelerator bearing point, the follower arm acting upon the accelerator will fail to cam up the operating rod catch sufficiently for it to clear the operating rod hook and the bolt will not go forward when the clip has been inserted and latched. Replace bullet guide to correct this condition.
5 Bolt Releases before Clip is Latched:
This condition happens when a clip is inserted but the bolt releases before the clip is locked into position. This normally requires the shooter to pull back the operating rod and eject the clip. The causes of this failure more are listed below.
Weak or broken Clip Latch Spring
The first thing to check is that the clip latch or clip latch spring is in spec. It’s not uncommon for the clip latch spring to weaken with time. The springs are cheap to replace and often solve several problems the M1 can have.
Manually press on the clip latch to see that it is not binding in the receiver and that the clip latch spring has sufficient tension to rotate the clip latch on its hinge pin. If there is binding, examine for burs and remove by stoning or filing. If binding is due to deformation or improper dimensions, replace the clip latch. Replace a weak or broken spring.
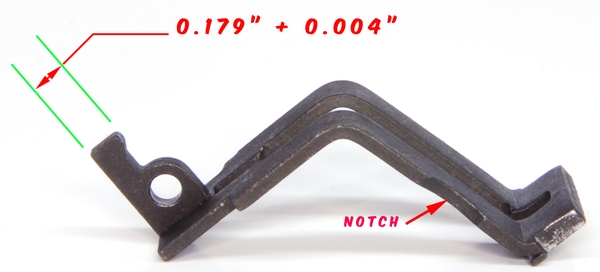
- Operating Rod Catch Out of Spec:
Next, check the radii on the hooks of the operating rod or operating rod catch. If the radius is excessive this will cause the bolt to go forward before the clip is latched. If this happens replace the parts.
- Bullet Guide Bearing Point to Tall:
A bullet guide that is high at the accelerator bearing point should be removed from the rifle and stoned at this point until the accelerator will not cam up the operating rod catch sufficiently to release the operating rod until the clip is fully inserted and latched.
6 Clip Ejects Early:
This malfunction causes a partially loaded clip to eject before all the cartridges are fired. Start by inspecting the clip latch and spring as shown below. Inspect the stock in the area that has an inlet to support the clip latch. If the stock is touching the clip latch arm, enlarge the area until it no longer binds the latch arm.
Next, verify the clip isn’t warped or damaged and the notch to retain the clip isn’t deformed or damaged. Try using a different clip and see if the problem persists.

Finish by inspecting the Follower Arm. Verify it’s not bent and in spec.
